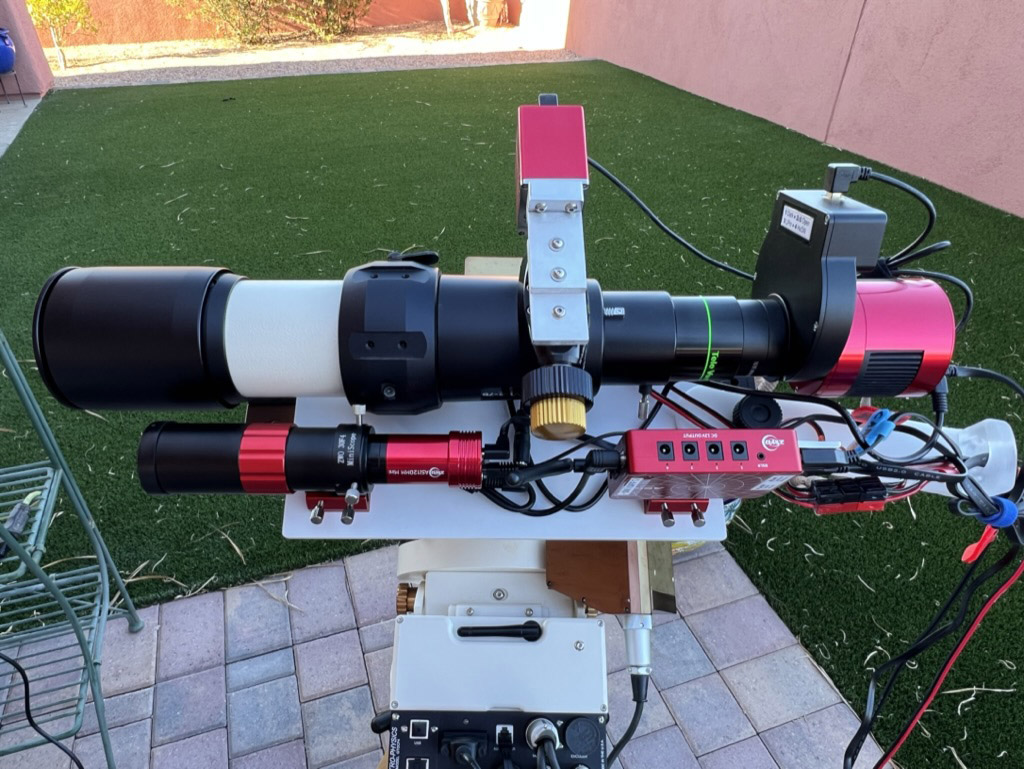
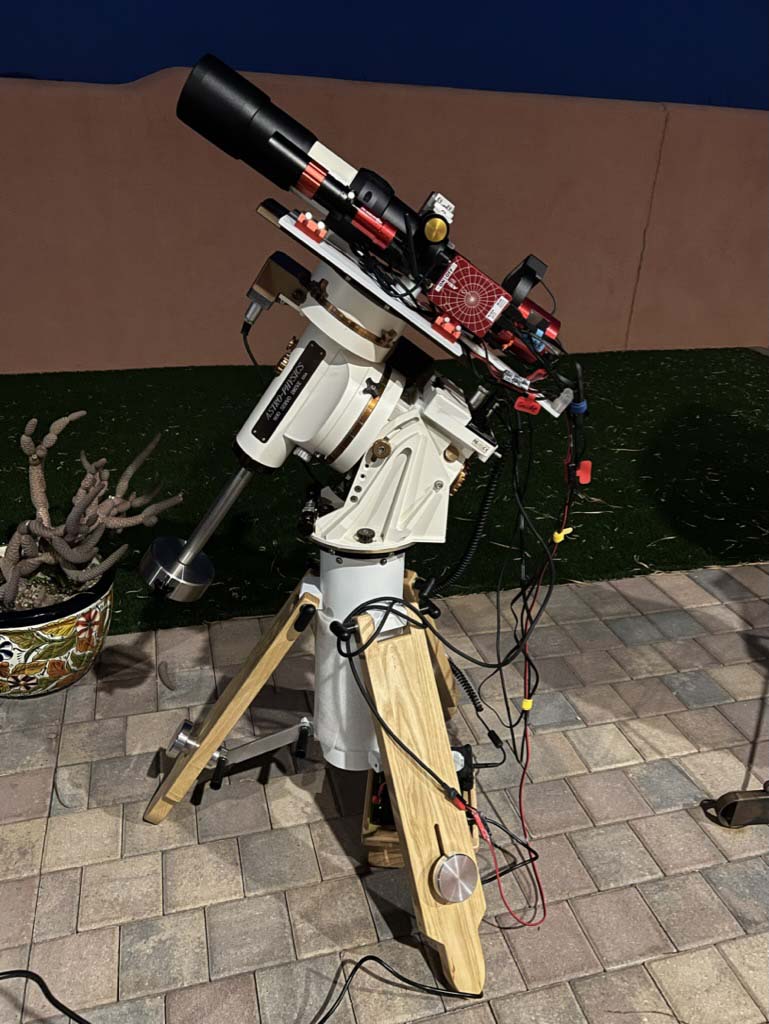
What’s Out Tonight?

A general ASTRONOMY site to get you started exploring the night sky

Astrophotography 

The topic of asytrophotography and getting into the hobby is way beyond the purpose of this site but here is some basic information on what is needed for the hobby.

Interested in the hobby of Astrophotography?

FIRST
Ask yourself why you want to get into astrophotography when the professional observatories and space telescopes are providing us with the best possible images of the heavens! And, what will you do with your images—why do you want to take them (If you want it as a hobby, that is understandable)?

SECOND
Please Read the 8 Points Below

PREAMBLE
My discussion on this page is in regards to obtaining astro images using a telescope. It is not about using SLR cameras to take Milky Way Band pictures or using a SLR and associated lenses to take astro images.


POINT 1

Astrophotography using telescopes is expensive and has a LONG learning curve.

POINT 2
Expect a minimum for equipment of about $3,000 or more. If you get into it, expect a lot more than $3,000, like $10,000+.

POINT 3
There are two parts to astrophotography. First, you obtain the images using a telescope and second, you have to process the images using specialized astro computer programs and maybe even Photoshop.

POINT 4
The learning curve for processing the images is a long one. Its cost is about $500+ initially for applications. But, you will probably spend more for add ons to the processing programs and purchasing video instructions, and/or attending seminars.

POINT 5 
If you are just into processing, again, the learning curve is steep but you can purchase “raw” images and process them to your satisfaction. This can save you a lot of money from having to purchase the telescope and camera equipment, and frustration using them to obtain the raw images yourself (there are always glitches with the equipment and weather issues). One such service that sells raw images is Telescope Live. And, watch this Video about such services.

POINT 6 
To save on costs, purchase used equipment. And, sell your equipment when you upgrade. The best place to buy used and to sell is to join, for free, CloudyNights.com. People who stay with astrophotography often buy and sell their equipment for upgrades, etc. So, keep your equipment in good shape to get maximum dollar for sale. If astrophotography is not for you, you can sell your stuff and not feel too bad about all the money spent.

Some Videos that will give you a feeling for this hobby:

Cuiv • Excellent series of videos about astrophotography in general and Cuiv, his name, explains concepts well.

Masters of PixInsight • Good tutorials about processing.

POINT 7
If you like “fiddling” and have patience working through equipment issues and learning new programs, then astrophotography might be for you.

POINT 8
If you want a hobby and are leaning towards astrophotography, then do it but don’t expects great results immediately! It is an ongoing challenge that can be rewarding. There are many videos and user groups that can be helpful in this pursuit.

SOME TERMS

CMOS 
CMOS stands for Complementary Metal Oxide Semiconductor and is the type of sensor that is mostly used to capture astro images. Almost all phones and SLR cameras now use CMOS sensors. In the past, CCD sensors were used but CMOS has several advantages over CCD.

SCT
Schmidt-Cassegrain Telescope, a popular compact reflector-type telescope that has a corrective optical plate in front which also seals the telescope tube.

GEM
Motorized German Equatorial Mounts are often used for astrophotography because they can follow and mimic the true movement of celestial objects. See GOTO.

GOTO (spoken as Go To)
A GEM mount that is motorized and computerized, thus capable of automatically moving to and finding any selected object from a hand controller or app/computer program.

DSO
Deep Sky Objects include clusters of stars (like the Pleiades), various types of nebulae (like the Orion Nebula) and galaxies (like the Andromeda Galaxy).

Equipment Overview

FILTER WHEEL
OPTIONAL
Holds specialized filter(s) to enhance image of celestial object.
COST
Single Filter Holder:  $75
Auto Filter Wheel (Holds 5):  $300

AUTO FOCUSER
OPTIONAL
Accurately focuses images. Can refocus for temperature changes and more.
COST
$300

FILTERS
OPTIONAL
Inside are specialized filters 
to aid in capturing images.
COST
Individual FIlters:  $75 to $300
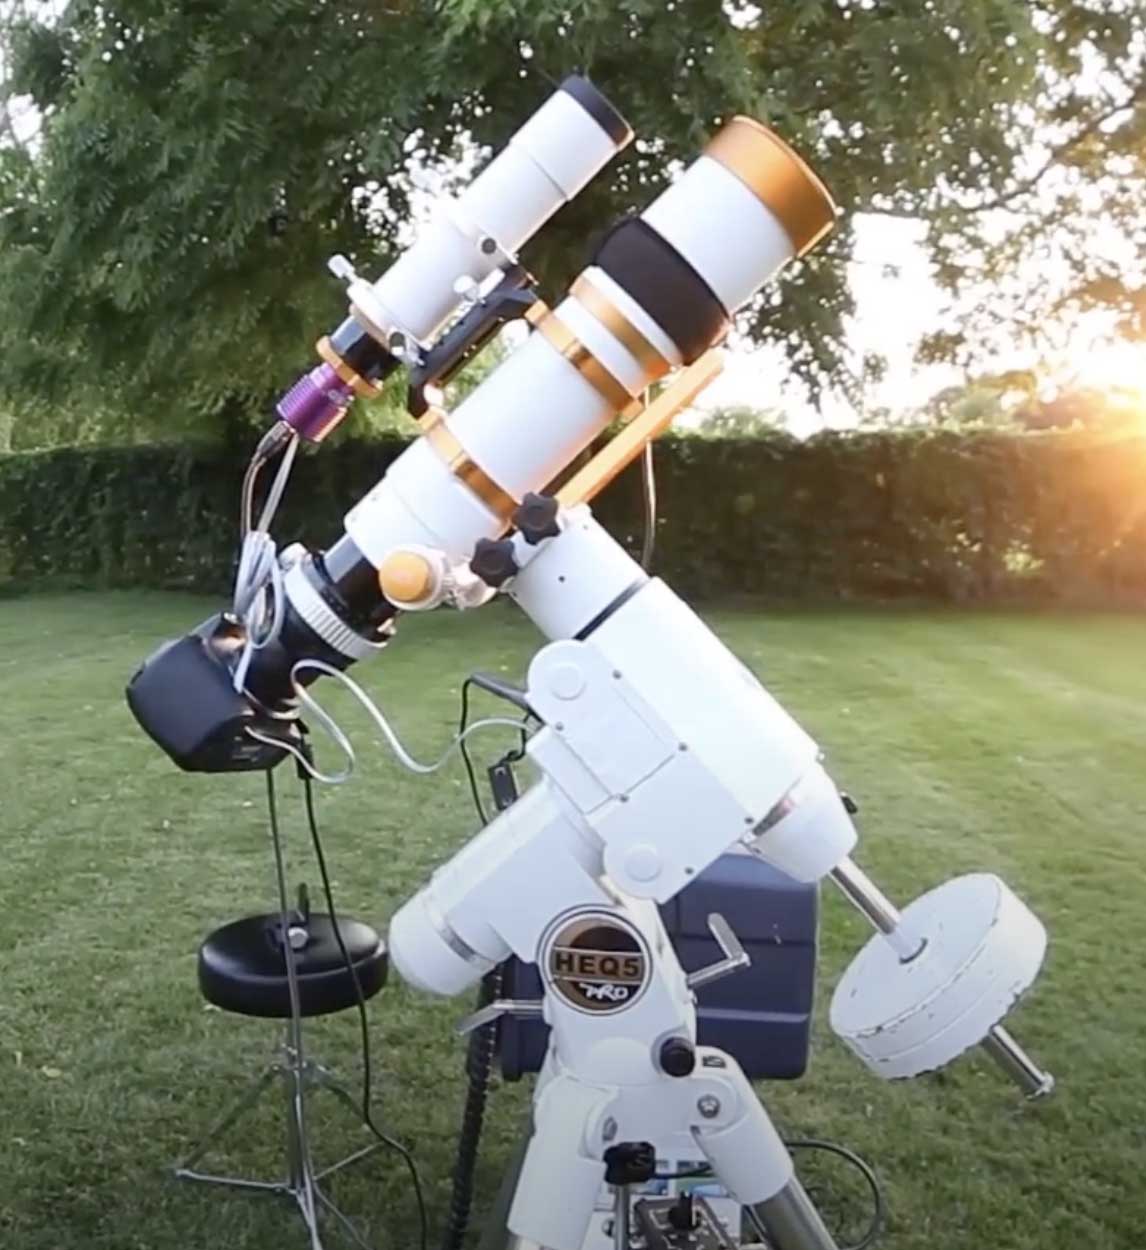
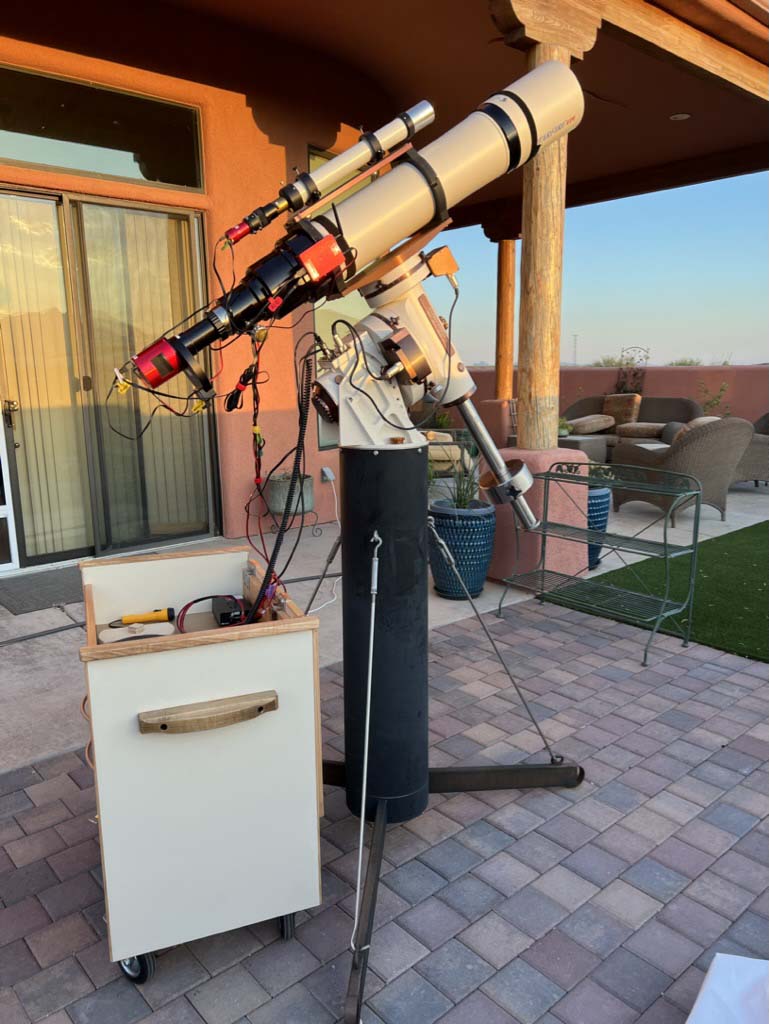
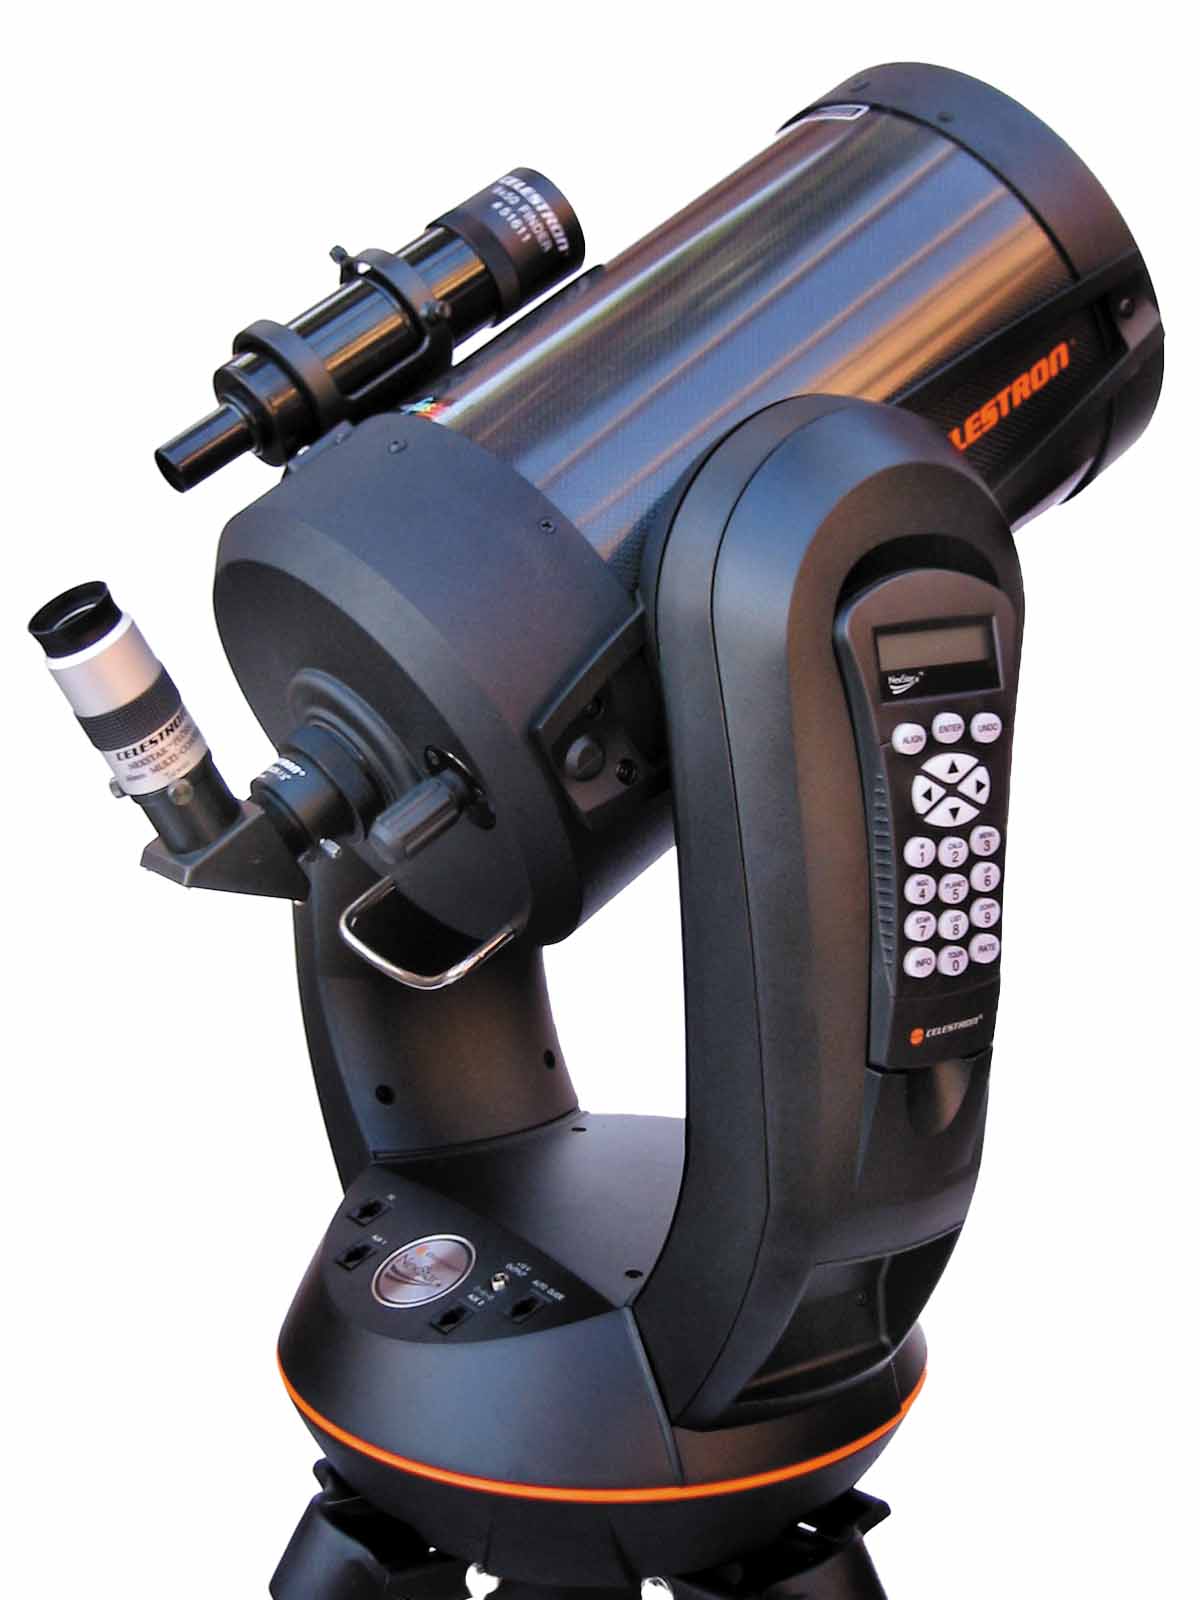
TELESCOPE
NECESSARY
Refractors often used from 2-inches (50mm) to 3 or 4 inches. Can use reflector telescopes. 
COST
$500 to $5000+

CAMERA
NECESSARY
Can be a SLR camera, specialized CMOS cooled camera for Deep Sky Objects like galaxies or nebula or special CMOS video camera for the planets, Moon and Sun.
COST
$200 to $5000+

GUIDESCOPE/
AUTOGUIDER

OPTIONAL 
BUT HIGHLY RECOMMENDED

Keeps telescope accurately on target—necessary to keep stars round for extended exposures. The guidescope is a small refractor equipped with a small CMOS guiding camera. 
COSTS
Scope:  $100
CMOS Camera:  $150

WIRES
Use a lot of wires to connect everything together.
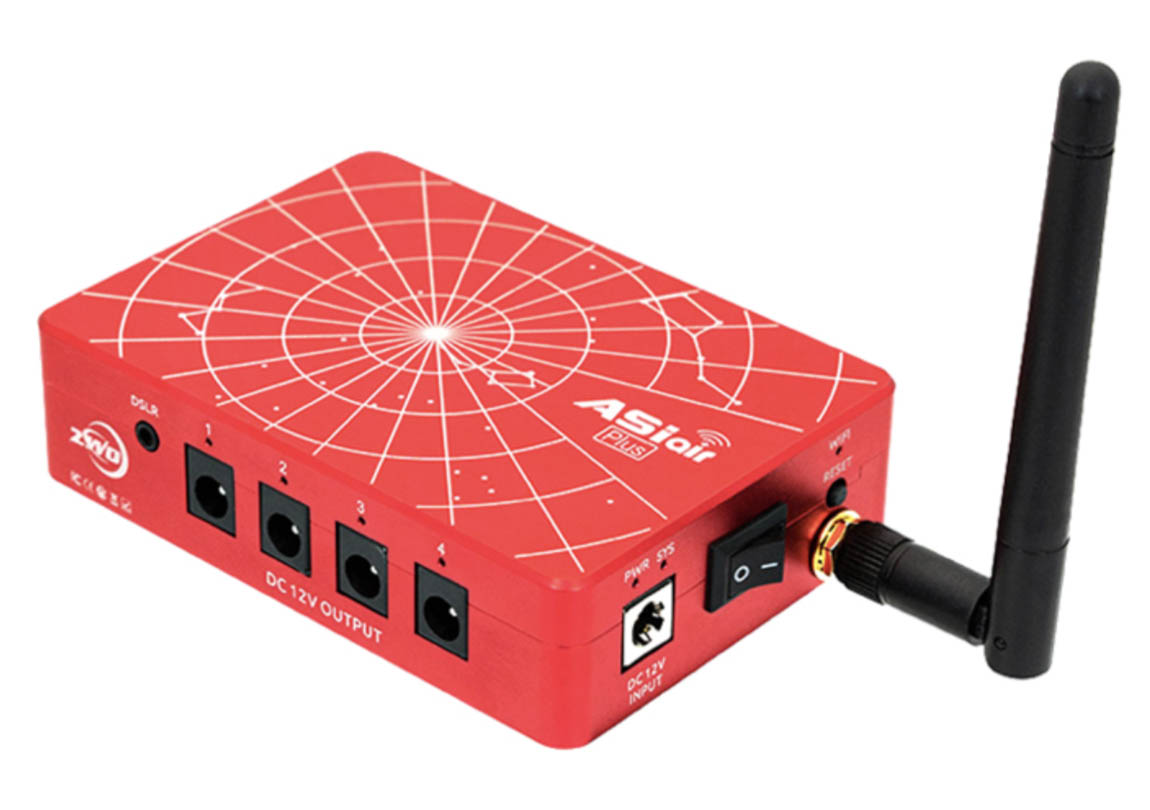
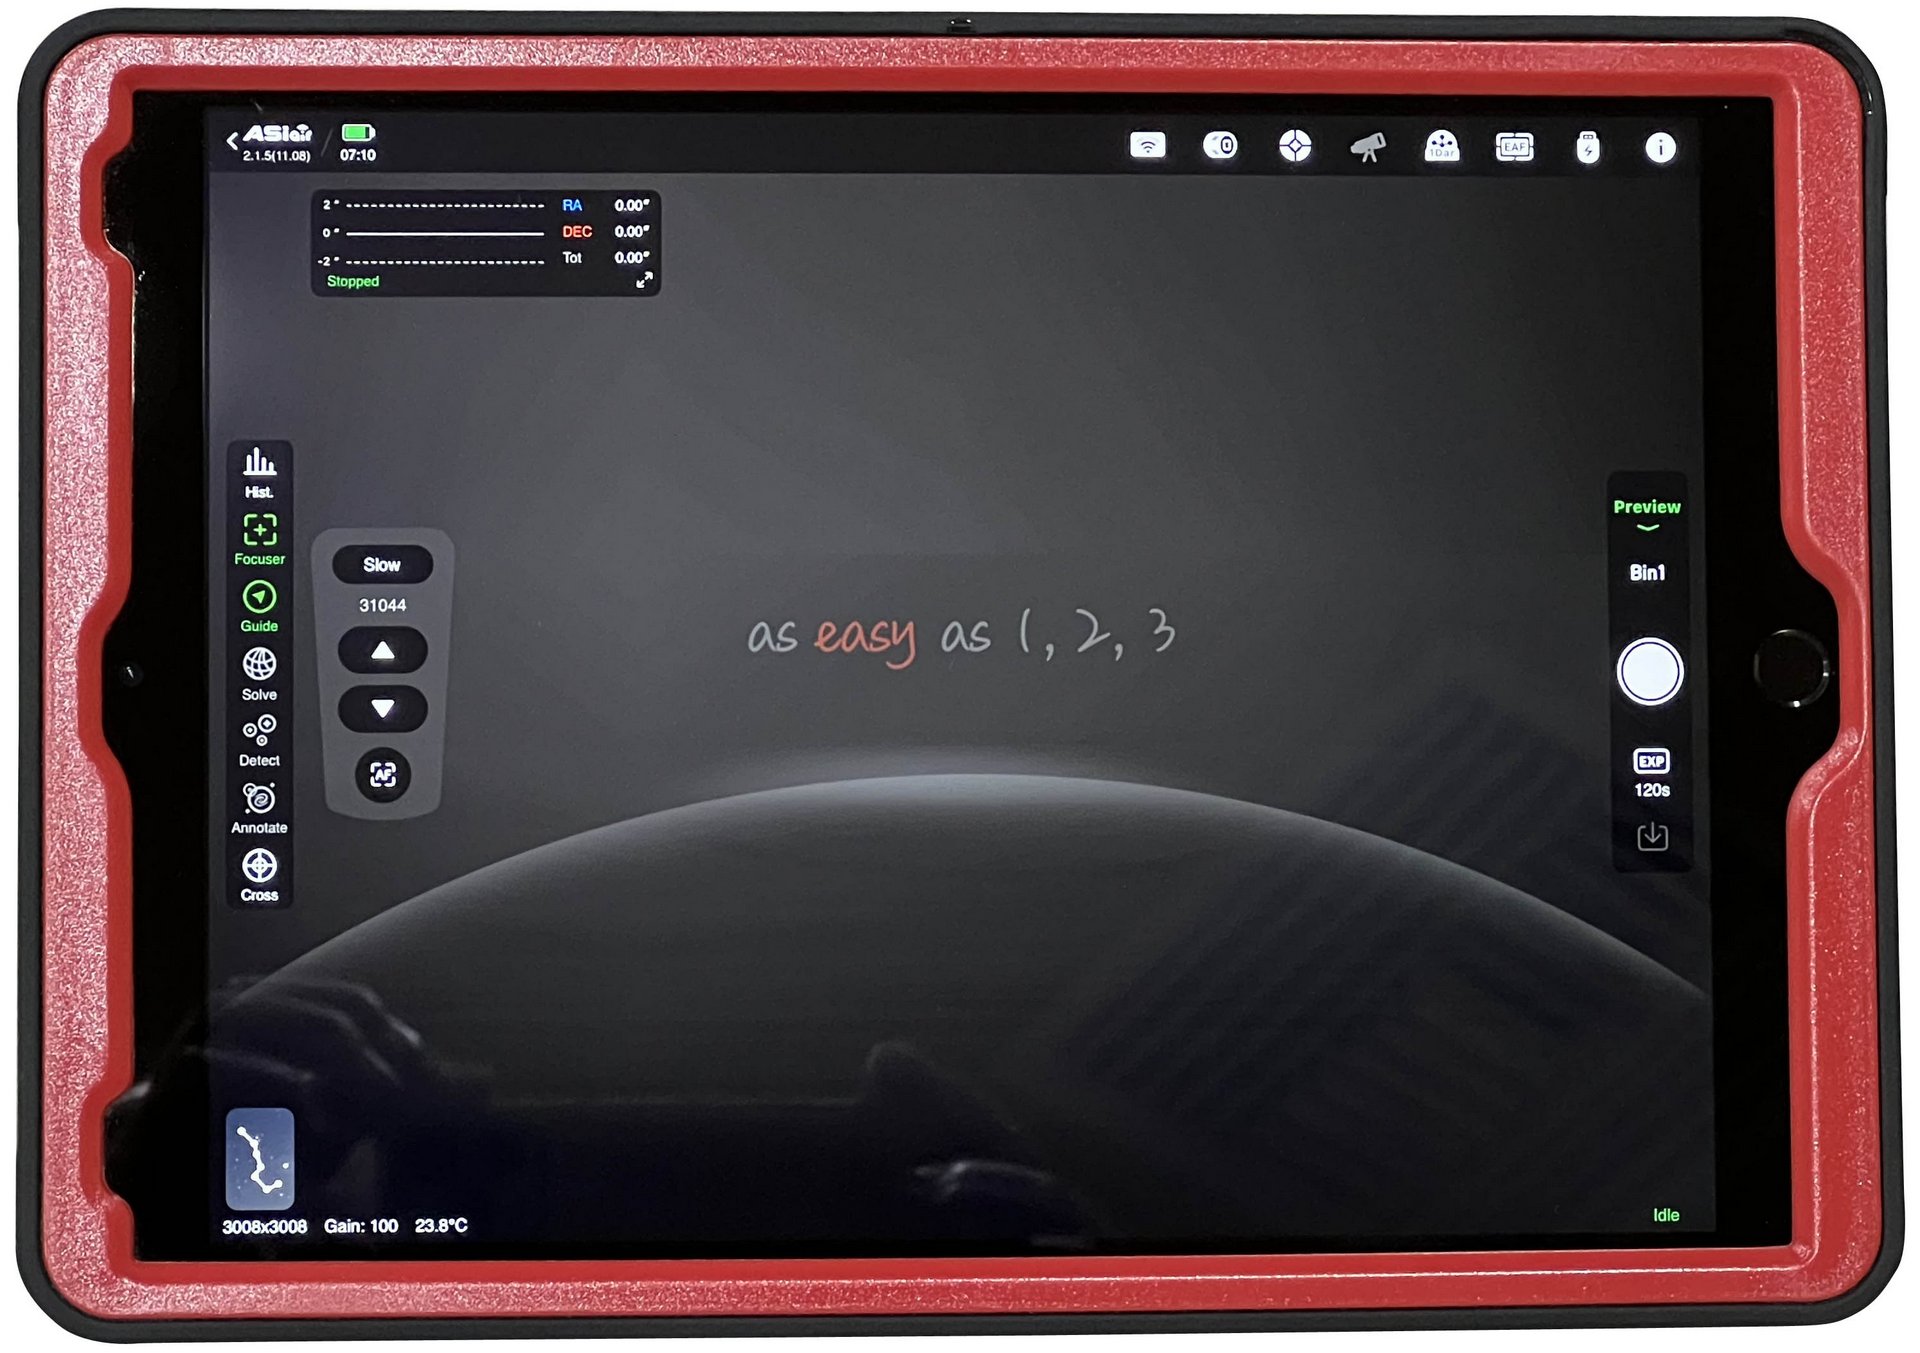
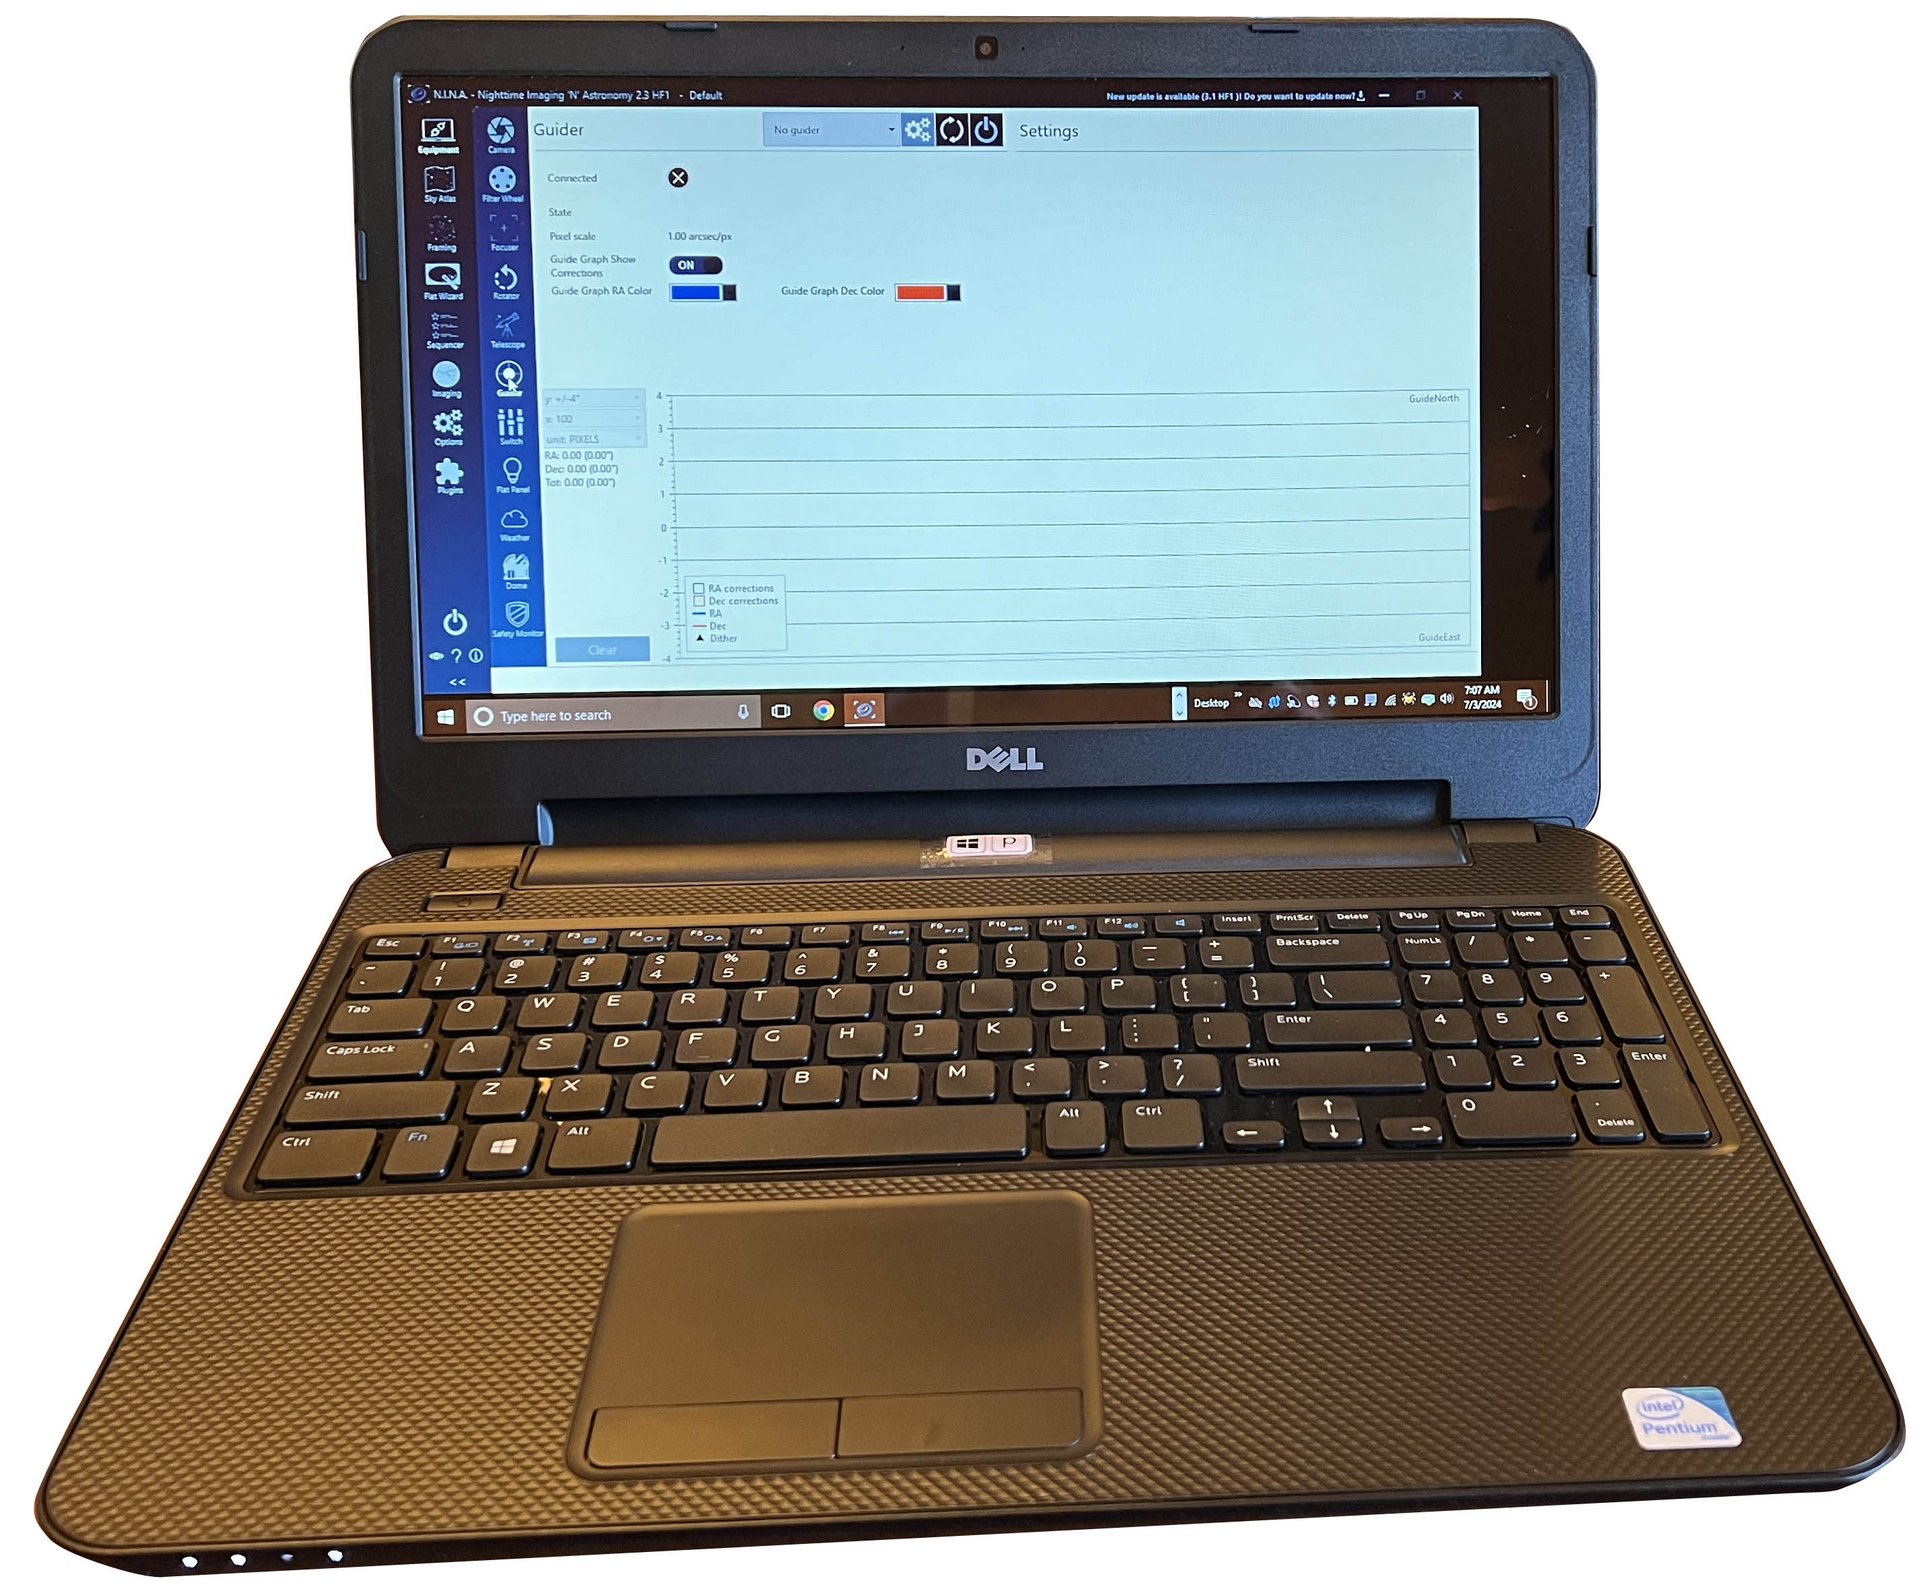
COMPUTER INTERFACE
NECESSARY
Interfaces with all the astrophotography “attachments” on the telescope providing a pathway for control by an App (phone or tablet) or Windows Program (NINA).
COST
$100 to $300.

MOTORIZED EQUATORIAL 
MOUNT & TRIPOD

NECESSARY
The motorized and probably computerized equatorial mount is necessary to follow celestial objects as they are imaged and the tripod needs to be very steady, too.
COST
$1000 to $5000+

12 Volts DC  is what 99% of telescope mounts and accessories use for power. As you might not know, 
12V DC is actually 13.8V DC. You can power your mount/equipment with a “big” battery or use a transformer 
plugged into an electrical outlet. The 12V is an international standard.

1

To capture images you need one of these 3 setups, A, B or C.

A

SLR Camera

Attach SLR Camera to a Telescope on a German Equatorial Mount (GEM).

SLR Camera

PROS
You own an imagining devise, the camera, and can thus save some money.

CONS

The images of Deep Sky Objects (DSOs) like nebulae and galaxies are not as good as from a dedicated CMOS astro camera.

NOTES
1. SLRs can be used to take images of both DSOs like nebulae and galaxies AND the planets/Moon.
2. You can get by with a smaller GEM-type mount and tripod saving you money.

B

Dedicated Astro 
CMOS Camera

Attach CMOS Camera to Telescope on a German Equatorial Mount (GEM).

Specialized Astro CMOS Camera

PROS
Allows the highest quality imagery—cameras for Deep Sky Objects are cooled to 0° C or less to increase sensitivity.

CONS

Need two different types of CMOS cameras to capture Deep Sky Objects (DSOs) and the planets. CMOS cameras to capture Deep Sky Objects can be expensive. However, CMOS cameras to capture images of the planets are inexpensive.

NOTES
This is the path that most astrophotographers take because it provides the best images and greatest flexibility.

C

SCT Telescope with Starizona’s HyperStar and Astro CMOS Camera

Use Telescope on its
Alt-Az mount

HyperStar

Astro Camera

PROS
You don’t need a dedicated German Equatorial Mount (GEM)—use Alt-AZ that often comes with the Schmidt-Cassegrain Telescope (SCT). Easiest to capture images. Highly recommend a SCT from Celestron.

CONS

You cannot image details of small objects like planetary nebulae, many galaxies and the planets.

NOTES
1. The HyperStar is placed in the front of the telescope and the astro camera is placed on top of the HyperStar.
2. The HyperStar allows wide angle imagery of the night sky, making it easy to capture many objects in their entirety—there are numerous objects that are very large in the night sky—much bigger than the Moon.  

Popular Astrophotography OEM Vendors

Many of these products are sold at physical Telescope Stores or on-line Telescope Stores

2

To control your telescope and camera, and to schedule and capture your images, you need an App 
or Computer Program.

Use A or B

A

ZWO ASIAIR and Tablet or Smartphone App

The ASIAIR (pictured above) by ZWO is a mini-computer attached to the telescope/mount. All astrophoto accessories are plugged into this computer box—the camera, auto focuser, autoguiders and rotating filter holder. A major downside to the ASIAIR is that only ZWO products work with it but their products are high quality.

There is a corresponding ASIAIR app that can be downloaded to your tablet or smartphone and it allows control of the camera, mount and accessories.

The App is fairly user friendly, but you do have to “play” with it to become familiar with its use. There are plenty of YouTube videos to get you started.

The Home screen of the ASIAIR app on a tablet. The app is available for phones but that screen is very small to navigate. This app is used to control all your astro accessories and to schedule your imaging session. Most astrophotographers use a GOTO GEM mount. So, you can schedule all the objects you want imaged for a night and the images will be obtained automatically. Yes, after the telescope/camera images one selected object, the “telescope” will automatically move to the next object and the next. Now, when you image an object, it is not just one exposure. Normally, you will take multiple exposures of the same objects. Exposures vary from about 1 to 5 minutes and depending on the object, you might take 15 or more exposures.

B

Mini-PC, Laptop and NINA Program

Almost every astrophotography “accessory,” that is, cameras, autoguiders, auto filter rotators, focusers and field rotators can be accessed and controlled with free programs BUT this only works within a Windows desktop or laptop environment. Can't use a Mac or smartphone/tablet.

The computer program that is used is abbreviated NINA which is an acronym for Nighttime Imaging ‘N’ Astronomy. It IS the most powerful and feature laden control program for astrophotography. However, its learning curve is longer than the ASIAIR and you are confined to a Windows desktop or laptop.

So, the way this works is that you have a mini-computer attached to your scope or mount. All your astro gear plugs into the mini-computer and on the mini-computer are the software drivers for the various accessories (these drivers are free). The mini-computer is linked to the desktop/laptop with NINA by WiFi or cable.

Click on the pic below to see a large image of the program NINA imaging a celestial object (the Heart Nebula). The program might look intimidating but you get use to it with use.

3

After you “capture” your image of a faint celestial object, you then have to process the image to make the object visible and “pretty.’

Processing your Images

Taking pictures of very faint Deep Sky Objects like nebulae and galaxies is not the same as taking everyday pictures in indoor or outdoor light. Remember, with your eyes, you cannot see any of the faint objects in the sky. So, you need to work at the limits of technology to capture these very faint images. The way this is accomplished, from the ground on Earth, is to take multiple exposures​ (like 15 or more) of the same object. The exposures usually range from 60 to 300 seconds each. Once you acquire the 15 or so images, you use special programs to combine all 15 in order to increase the signal (the very faint light) to the noise (noise or random signals always exists in electronic sensors and is especially prevalent at low light levels). This brings out, adds or enhances the faint light of the objects, making it visible. You then work to make the image “pretty.”

Basic Steps and Comments about Processing

1. You take multiple exposures of the same object. For DSOs, like nebulae and galaxies, this could be a minimum of 15 exposures with each exposure anywhere from 60 to 300 or more seconds. You DO NOT just take one long exposure—there are many reason for not doing this.

2. Remember, the light emitted by these objects is very low, so you are working at the limits of the electronic sensors. For DSOs, the dedicated astro CMOS cameras are cooled to either 0°C, –10°C or –20°C to make the sensor more sensitive to low light levels (and for a few other reasons, too).

3. You bring your images into a specialized astro image processing program—most use PixInsight , available on the Mac or Windows—not available on tablets—lots of intense processing.

4. PixInsight will take all of the exposures of your object and stack or add them up to increase the light accumulated from the multiple exposures that you made. 

5. There are a lot of different types of processing that you can do in PixInsight. This is not an easy program to learn (very steep learning curve) but it is a very powerful program. Oh, the amount of initial processing is very computer/processor intensive—it can take anywhere from 15 minutes to way over an hour to initially combine your images of a single object—then you have to do other processing to enhance the image

6. Although you can accomplish a lot of processing in PixInsight, some people will use Photoshop or Affinity Photo to further enhance their image because some people have experience with these programs. Photoshop/Affinity are more intuitive to use than PixInsight and have an incredible array of processing tools. But, if you do not know anything about Photoshop/Affinity, you have another steep leaning curve for their use. You can get by with just PixInsight.

7. PixInsight costs about $300 and it is a one-time fee. Photoshop, unfortunately, has to be rented for about $25 month. Affinity is a one-time $75 fee. Most likely, you will view the many free YouTube tutorials, pay for other tutorials and even pay for some seminars on processing your images. There are some add-ons to PixInsight that you will want to purchase to help with processing but there are a number of free add-ons that are also available. 

PixInsight program. Again, this is a powerful prograrm for processing celestial images. It is available for about $300 on the Mac and Windows. Most people use this program but it does have a very steep learning curve. It is not logical like many apps or programs. There are a lot of tutorial videos, free and for a cost, to help you learn the program.